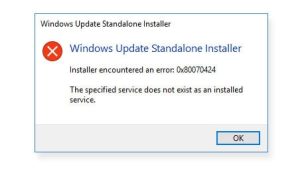
Windows Update Standalone Installer is a built-in tool that is related to windows update packages. In short, it is also called Wusa.exe. This deals with downloads and installs of Windows Update packages. Windows update error 0x80070424 is affiliated with Windows Update Standalone Installer (Wusa.exe). The windows error 0x80070424 mostly pops up when any system files are missing while updating the Windows. The error 0x80070424 pops up when the update service stops because of missing files during the installation of Windows.
Solutions to Fix the Windows Error Code: 0x80070424
After knowing about the cause of the error 0x80070424, let us go towards the solutions to this error.
1. You need to utilize the windows update troubleshooter
At first, you have to use windows Troubleshooter which will help you to fix the error 0x80070424. You can follow these simple steps to utilize Windows troubleshooter.
- To get started, you have to start the run box by pressing the Windows key + R key.
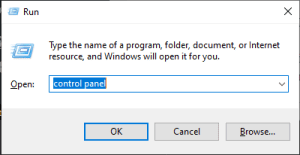
- Now you should type the control panel in the open box of the run window.
- It will open the Control Panel window. Then you should select the System and Security option of the control panel window.
- Now you need to select the update troubleshooter.
- Then you should click on the option Fix problems with Windows update.
- You should find out and click on the Advanced tab option in the window.
- Now you need to left-click on the Run as administrator option.
(Note: You need to make sure that you have clicked on the Apply repairs automatically option)
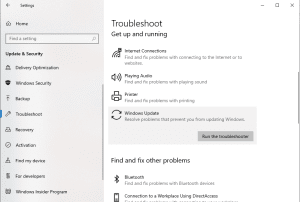
After the completion of these steps, you can find that the troubleshooter automatically starts to scan to recognize errors with your system updates. You should wait for some period of time patiently for its completion as it takes several minutes to complete.
2. You can run System file checker (SFC) and Deployment Image Servicing and Management (DISM)
Sometimes, the error 0x80070424 can pop up due to corrupt files. You have to run the System file checker tool to find and remove the corrupted files from your computer. You can launch the system file checker in the following way.
- Press the Windows key + R key to open the Run Window.
- You should type CMD.EXE in the open box and hit Enter.
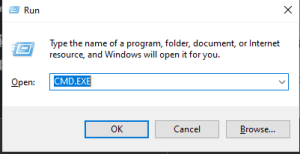
- The command prompt window will pop up on your computer screen.
- You should type SFC /scannow in the command prompt window.
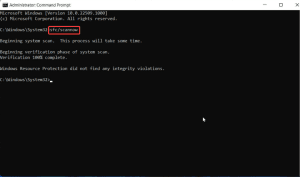
- The process will start automatically.
- You must wait for the process to complete.
- Restart the computer after the completion of the SFC scan.
You can also use DISM scan as an alternative for SFC scan. Follow these steps to do a DISM scan.
- Enter the Windows key + R key which will help you in opening the Run Window.
- You should type CMD.EXE in the open box of the Run window and hit Enter or click on OK to the command prompt window.
- After opening the command prompt window, you need to type the following and hit enter.
- DISM.EXE /ONLINE /CLEANUP-IMAGE /SCANHEALTH

-
- DISM.EXE /ONLINE /CLEANUP-IMAGE /RESTOREHEALTH
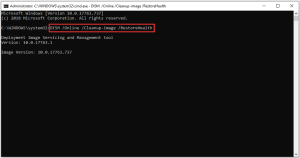
- After you give this command in the command prompt, you can close the command prompt.
- This will scan the available windows OS boot image and the upcoming updated boot image.
- After completing the process, you should restart your computer.
Finally, you have to check if your error 0x80070424 is solved. If the error 0x80070424 is not solved, you should use another solution method to fix this error.
3. You need to Register the System Files
Windows system files are in .dll format. Those files are needed to download and install the Windows update. If those .dll files may not be registered on your Windows PC, the error 0x80070424 can pop up. You should register those .dll files in the following way.
- Press the Windows key + R key in order to open the Run box.
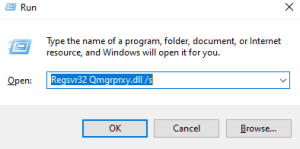
- You should type the following command in the open box of the run window line by line and hit Enter or click on OK.
- regsvr32 Qmgr.dll /s
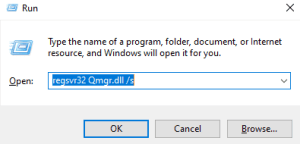
-
- Regsvr32 Qmgrprxy.dll /s
- Finally, you need to restart your system.
You have to check whether the error 0x80070424 is fixed on your computer or not. You can check it by running the Windows update.
4. Reset the Windows updates components
You should reset the windows update components using the command prompt and do this manually. Follow these easy instructions in order to reset the Windows Updates Components manually.
- You have to press the Windows key + R key which will lead you to the Run box.
- Then, type CMD.EXE inside the open box of the Run Window.
- A command prompt window will pop up on your computer screen. You should type these commands in the command prompt. Make sure you hit Enter after each line of command.
net stop wuauserv
net stop cryptSvc
net stop bits
net stop msiserver
Ren C:\Windows\SoftwareDistribution SoftwareDistribution.old
Ren C:\Windows\System32\catroot2 Catroot2.old
net start wuauserv
net start cryptSvc
net start bits
net start msiserver
- After giving these commands in the command prompt, you have to close the command prompt window.
You should check whether the error 0x80070424 is solved or not. You can check it by running the windows update. If the error 0x80070424 is not solved, you need to try other solution methods.
5. You need to make sure that critical Windows Update services are enabled
Some of the windows update services may not be running on your computer. You should be sure that windows update services such as Workstation, Windows Update, and Background Intelligent Transfer services should always be running on your computer in order to continue the download and installation of the update. If the error 0x80070424 pops up on your computer screen while updating your windows, you have to check those windows update services. If they are not enabled, you should enable them manually by following these steps.
- You need to press the Windows key + R key to open the run window.
- After the run window pops up, you have to type services.msc in the open box and hit enter or click on OK.
- A new window will pop up. The services window will appear on your computer screen.
- You can see the list of services there. You should find the Workstation, Windows update, Background Intelligent Transfer Service.
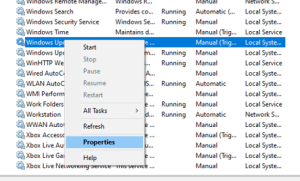
- After finding these windows update services, you should double-click on each of them.
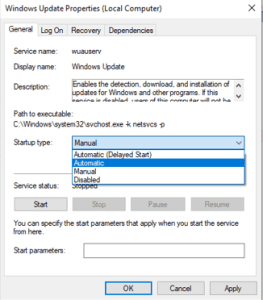
- You should be sure that these services are set to automatic and are running at the moment.

- If these services are not running on your Windows PC, you have to find the Startup type and set them to Automatic (Delayed Start) on each of them.
- Now, you should confirm the selection, select start, and close that particular window.
- Finally, you need to restart your system.
After you complete this process, you have to check whether the error is solved or not. If the error is not fixed, you have to follow another method of solution.
6. You can download the update manually
If you are getting the error 0x80070424 while updating the Windows, you can download the update manually from the Microsoft Catalog website. Before you proceed, you must be familiar with the problematic update code. You should follow these easy instructions to download the update manually.
- You have to go to the Microsoft Update Catalog website.

- In the search box of the site, you should type the update code and hit Enter.
- You should find the matching file which uses the same architecture as your computer system.
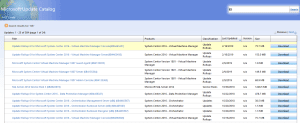
- After that, you can click on the download button on the side of the webpage.
- You must wait until the download completes.
- You have to run the setup file and follow the instructions given in the installation window.
- After the completion of the update, you should restart your computer.
Thus, we hope you fixed your error 0x80070424 with the help of this article.

